 Fieldclip
Home / Job tracker guide
Save job posts to a Notion job tracker in one click
A job search means dozens of postings across different sites. Keeping them in one Notion database lets you sort by salary, filter by status, and never lose a link. This guide shows how to set up the database and fill it straight from the job page.
Step 1: Create the job tracker database
In Notion, create a new database (a table view works well) and add these columns. The names matter: Fieldclip uses them to guess what goes where.
| Column | Notion type | Fieldclip fills it with |
|---|---|---|
| Role | Title | The page title, usually the job title |
| Company | Select or Text | The hiring company named in the posting's data (not the job board) |
| Salary | Number or Text | The salary range, when the posting publishes it ("USD 145,000–175,000 / year"); a Number column keeps the lower figure |
| Link | URL | The page URL |
| Date added | Date | Today's date |
Useful extras: a Status column (Applied, Interview, Offer, Rejected) and a Notes text column. Fieldclip doesn't set Status, so you can give it a default with a Notion database template. A column named Notes gets the posting's description, which you can replace with your own notes.
Don't want to build it? Duplicate the free Job Tracker template: it has these columns, a pipeline board by stage, and a table of every application.
Step 2: Connect Fieldclip to the database
Install Fieldclip, create a Notion connection, and share the job tracker with it. The setup guide covers this step by step. On the Free plan you get unlimited saves into one database, so the job tracker can be that database.
Step 3: Clip a job posting
- Open a job posting in Chrome.
- Click the Fieldclip icon. Pick your job tracker if it isn't already selected.
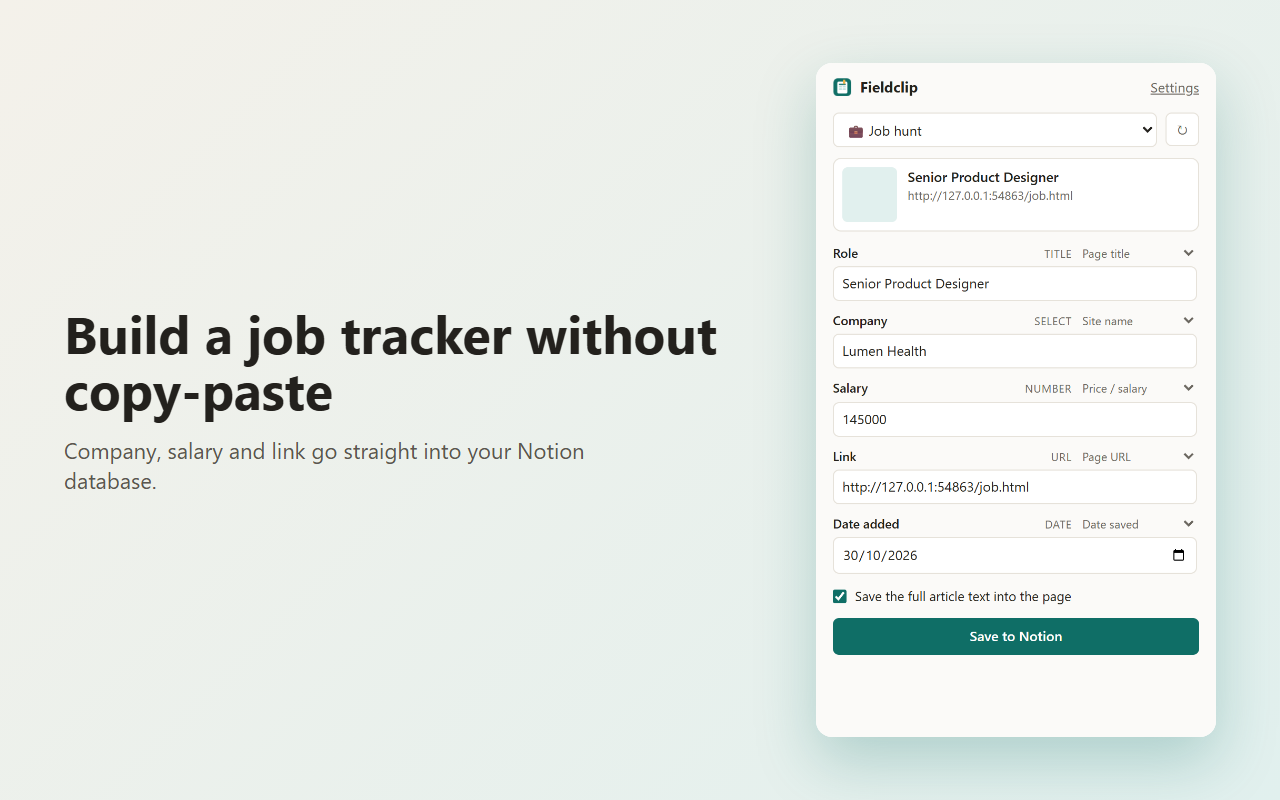
- Check the fields. Each one shows which part of the page it came from, and you can change the source or type over the value.
- Click Save to Notion. The posting appears as a new row in your tracker.
What to check before saving
- Company. Fieldclip reads the hiring company from the posting's structured data, so on LinkedIn, Lever, Ashby or Greenhouse pages you get the employer, not the board. If a site publishes no company data, you'll see the site's name instead; type the company in.
- Salary. It's filled only when the posting includes salary in its page data, which many job sites do and many don't. If it's empty, type it in or leave it blank. A range is shown in full ("USD 145,000–175,000 / year"); a Number column keeps the lower figure, a Text column keeps the whole range.
- Role. Some sites add their own name to the page title ("Senior Designer | Example Jobs"). Trim it if you want a clean column.
Whatever you change, it's saved exactly as you see it.
Make the tracker work for you
- Sort by Salary to compare offers at a glance.
- Add a board view grouped by Status to follow each application.
- Filter by Date added to see what you saved this week and follow up on older ones.